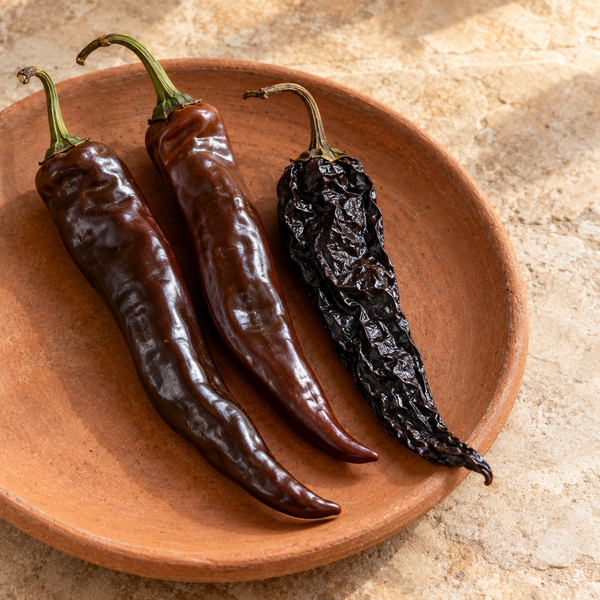
Growing peppers in Canada sounds like a tropical fantasy, but it comes down to three things: starting early indoors, keeping seedlings warm, and not rushing them outside. Use this guide to plan your indoor start, choose varieties for your kitchen and prepare seedlings for outdoor conditions.
Looking for seed first? Browse pepper seeds Canada for frying, roasting, stuffing, seasoning and sauces. Compare each variety’s growing notes with your available season.
Step 1: Choose your varieties
Match the variety’s maturity and intended harvest stage to your frost-free season. Heat level alone does not predict how quickly a pepper will crop: a heatless Habanada still needs time to ripen, while a green-harvest frying pepper may fit a different schedule.
- Roasting and stuffing: compare Ajvarski and Poblano.
- Fresh salsa and pickling: explore Early Jalapeño.
- Seasoning and sauces: choose the aroma and heat that suit your cooking; check each product’s current heat guide.
Find peppers for your garden
Skip the guesswork — start from what your garden needs:
Step 2: Start seeds indoors
Peppers need a long, warm head start — there's no direct-sowing them in most of Canada.
- Plan an indoor start around 8–10 weeks before your intended outdoor transplant date, adjusting for the variety and local conditions. Transplanting may be later than the last expected frost.
- Sow about 6 mm deep in seed-starting mix in a clean tray with drainage. If you use a humidity dome, remove it when seedlings emerge.
- Warm the seed-starting mix according to the packet’s instructions. Measure at seed depth if using a controlled heat mat; room temperature does not tell you the temperature of the mix.
- Allow for variation in germination time between varieties, seed lots and growing conditions. Heat level alone does not predict which seeds will emerge first.
Germination check: measure temperature at seed depth and check moisture daily. A controlled heat mat can help in a cool room, but an unmeasured hot spot can dry or overheat the mix.
Step 3: Give them serious light
After emergence, seedlings need bright light as well as suitable temperatures. A winter windowsill may not provide enough light.
- Use a seedling grow light with a daily dark period. Around 14–16 hours of light is a starting schedule for many home setups; intensity and fixture guidance determine the right setting.
- Set the light distance according to the fixture manufacturer’s guidance and adjust as the seedlings grow; LED output varies widely.
- Leggy seedlings can signal insufficient light. Check duration and intensity before changing the fixture distance.
Step 4: Pot up
Once true leaves appear, give crowded seedlings their own containers with drainage. Pot up again as roots fill the available space, before plants become root-bound.
Use a clean, well-drained potting mix intended for seedlings or young plants. Check whether it already contains fertilizer before feeding; follow the seedling dilution on the fertilizer label.
Step 5: Harden off
Gradually acclimate indoor-grown plants to outdoor sun and wind over roughly 1–2 weeks, adjusting to weather and plant response:
- Start with a few hours outdoors in a sheltered, partly shaded spot.
- Increase sun exposure and time outside each day.
- Avoid strong wind and full midday sun for the first few days.
Step 6: Transplant outdoors
Transplant after frost risk has passed and the soil has warmed. For planning, aim for settled nights around 12 °C or warmer; check the local forecast and keep plants sheltered if cold weather returns.
- Full sun: 6–8 hours minimum.
- Follow the variety’s spacing guidance and allow room for its mature canopy and airflow.
- Base feeding on the growing medium, soil test where available, and fertilizer label rather than a fixed recipe.
- Keep soil moisture consistent without waterlogging. Apply organic mulch after the soil has warmed to help retain moisture.
- Stake taller varieties — some pass 3 feet.
Planting depth: set pepper seedlings at the same soil level as in their pots.
Step 7: Pollination and fruit set
Peppers can self-pollinate. If flowers drop without setting fruit, first check temperature extremes, water stress and plant condition; a lack of bees is not automatically the cause.
Step 8: Harvest
Harvest stage depends on the variety and the dish. Green Shishitos and Poblanos suit frying or stuffing; orange Habanadas and Aji Amarillos develop their ripe flavour and colour on the plant.
- Check each variety’s maturity estimate and whether it describes a green or fully ripe harvest.
- Long-season varieties may need protected growing conditions to ripen before autumn cold.
- Cut with pruning shears rather than pulling; pepper branches snap easily.
In the kitchen: use your harvest for fresh salsa, roasted peppers or seasoning. Choose the harvest stage and heat level for the dish.
Step 9: Save your seeds
For seed saving, choose healthy, fully ripe fruit. Dry the cleaned seeds thoroughly before storing them in a labelled container in a cool, dry place. Stable open-pollinated varieties are the usual starting point; crossing with another variety, hybrids and unstable selections can produce offspring unlike the parent.
Want a garden that covers the whole spectrum next season? Build a sweet, mild and hot pepper garden with our curated seed collections.
Troubleshooting common pepper problems
For a tray that has not sprouted, use our pepper seed germination checklist before increasing heat or watering.
| Problem | Symptom | Fix |
|---|---|---|
| Slow germination | Nothing sprouts for 2+ weeks | Measure mix temperature and check moisture, sowing depth and the variety’s expected germination window before changing conditions |
| Leggy seedlings | Tall, weak stems | Check light intensity and duration; adjust height only within the fixture manufacturer’s guidance |
| Curling leaves | Leaves cupping or twisting | Check moisture, roots, pests and temperature; leaf curl has several possible causes |
| No flowers | Lush plant, no blooms | Check plant age, temperature, light and fertilizer use; avoid adding feed without identifying the cause |
| Flower drop | Buds fall before setting fruit | Check temperature extremes, water stress and growing conditions |
Plan your Canadian pepper season
Growing peppers here is a small act of rebellion against the frost — and careful timing helps make the most of the warm season you have.
Start with our Canadian pepper seed-starting calendar, compare the best pepper varieties for shorter seasons, and use the sweet vs. hot pepper guide to build a balanced garden.
Find peppers for your growing zone, or browse all Casa Verde pepper seeds →
Growing reference: University of Minnesota Extension: growing peppers. Adapt general guidance to your variety and local conditions.
Growing references (English): Johnny’s — pepper transplants · University of New Hampshire — seedling lighting.